Adding and editing forms
To work with forms, click on the Formie link in the sidebar.
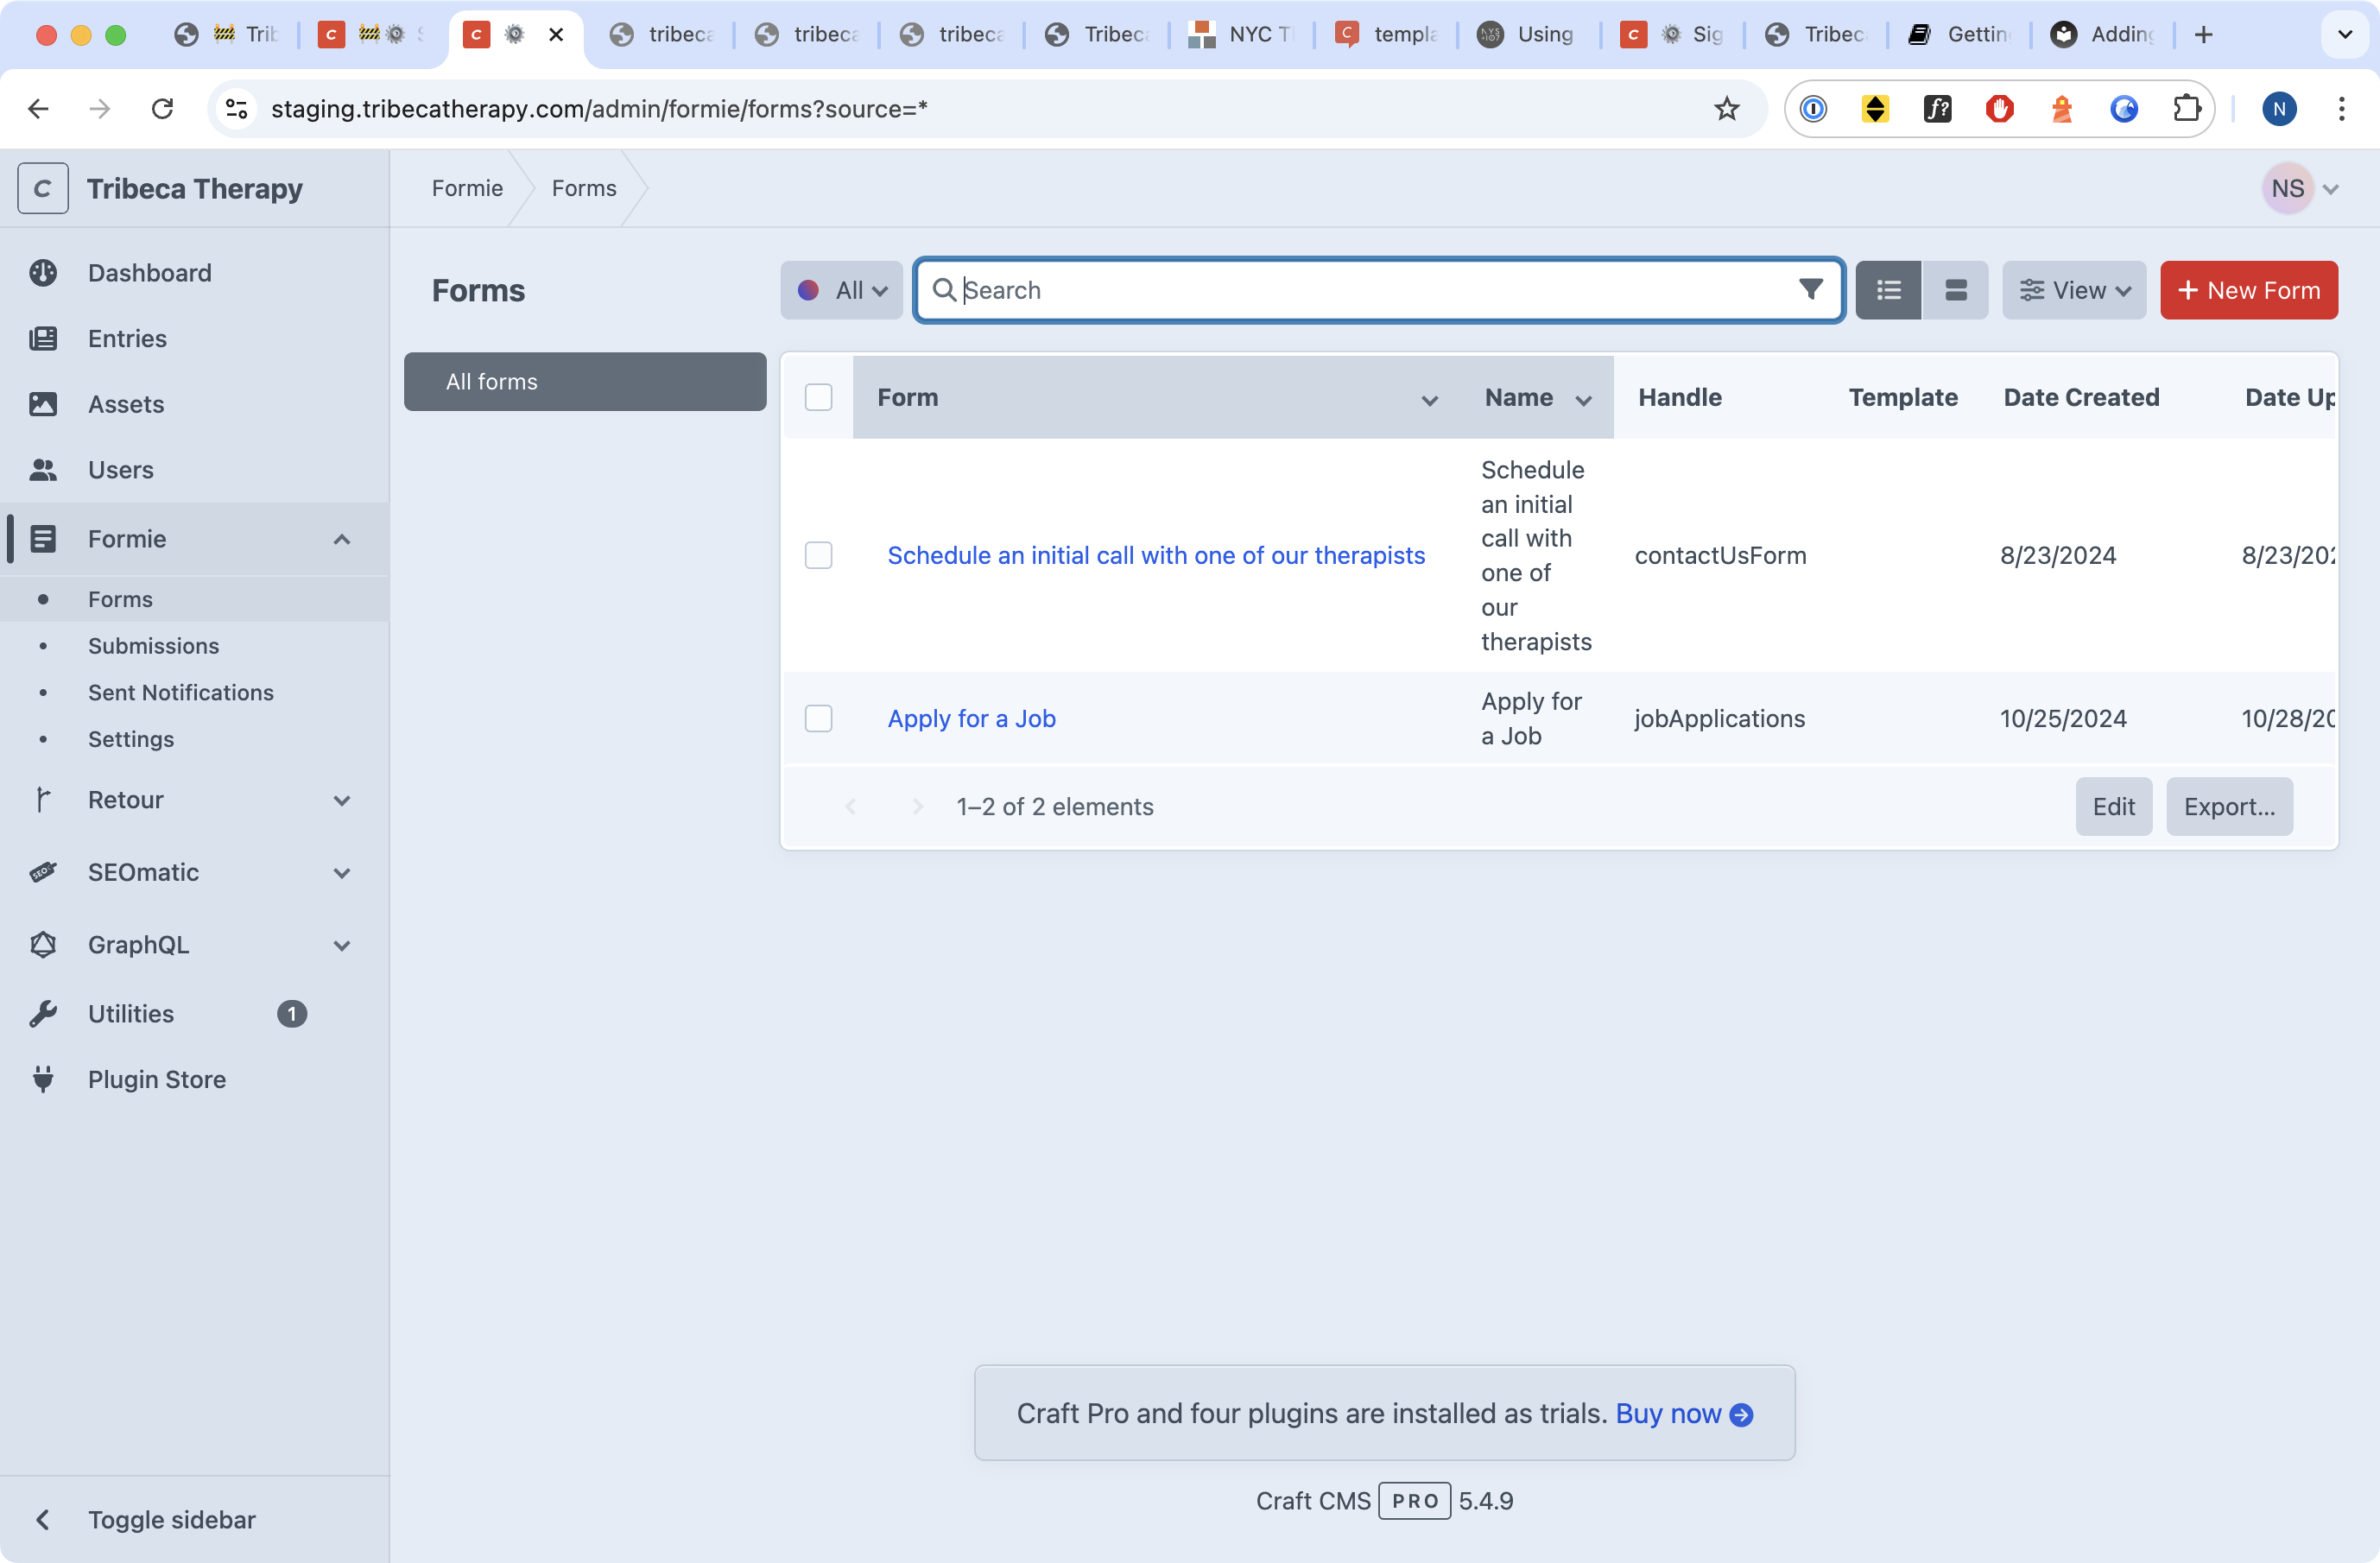
You'll see a screen that looks like the above. You'll notice that there are now subnavigation options below Formie:
- Forms (this is where you are)
- Submissions (where you go to see a list of submitted queries to the site)
- Sent Notifications (where you go to see the notifications, usually emails, that the site has sent to people who have submitted forms), and
- Settings (self-explanatory)
On the right hand side, you'll see a list of forms. You can either click the big red + New Form button to edit a form, or click on any of the existing forms to edit them.
Making a form
Making a form is pretty easy. It's entirely drag and drop. If you see a field you like on the right, drag and drop it to add the field to the form.
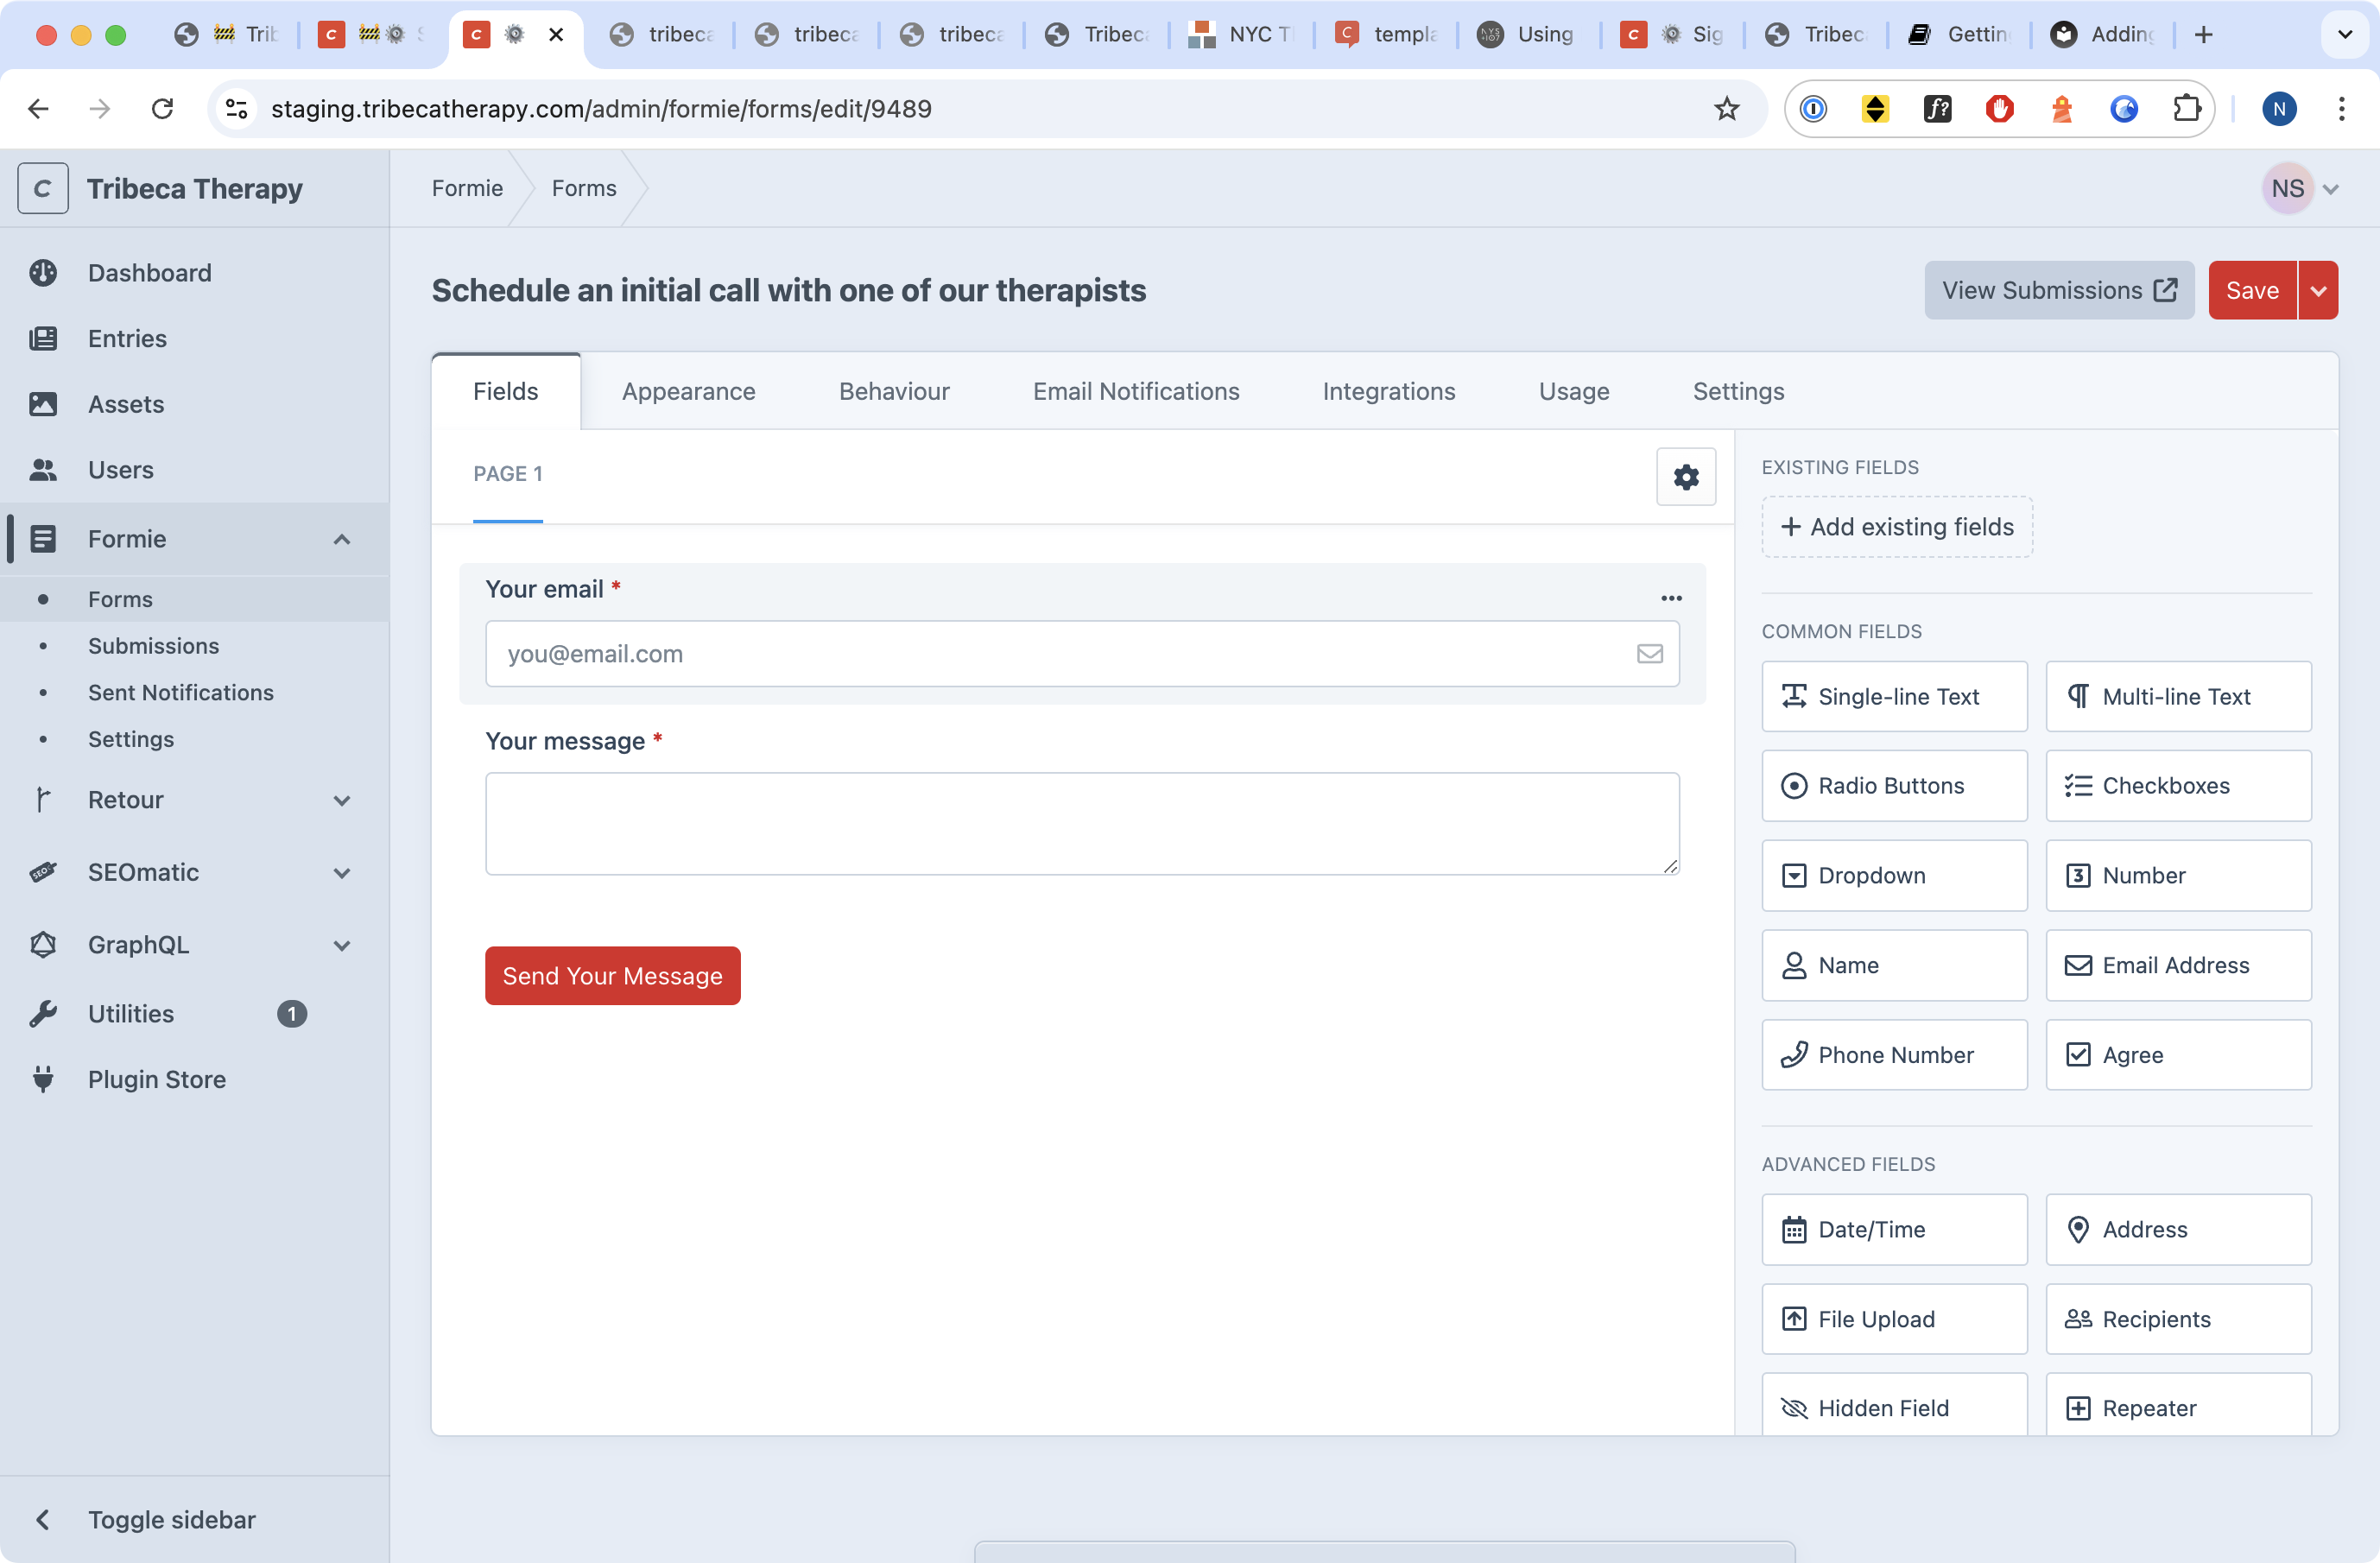
If you want to edit a field's details, you can simply click on it.
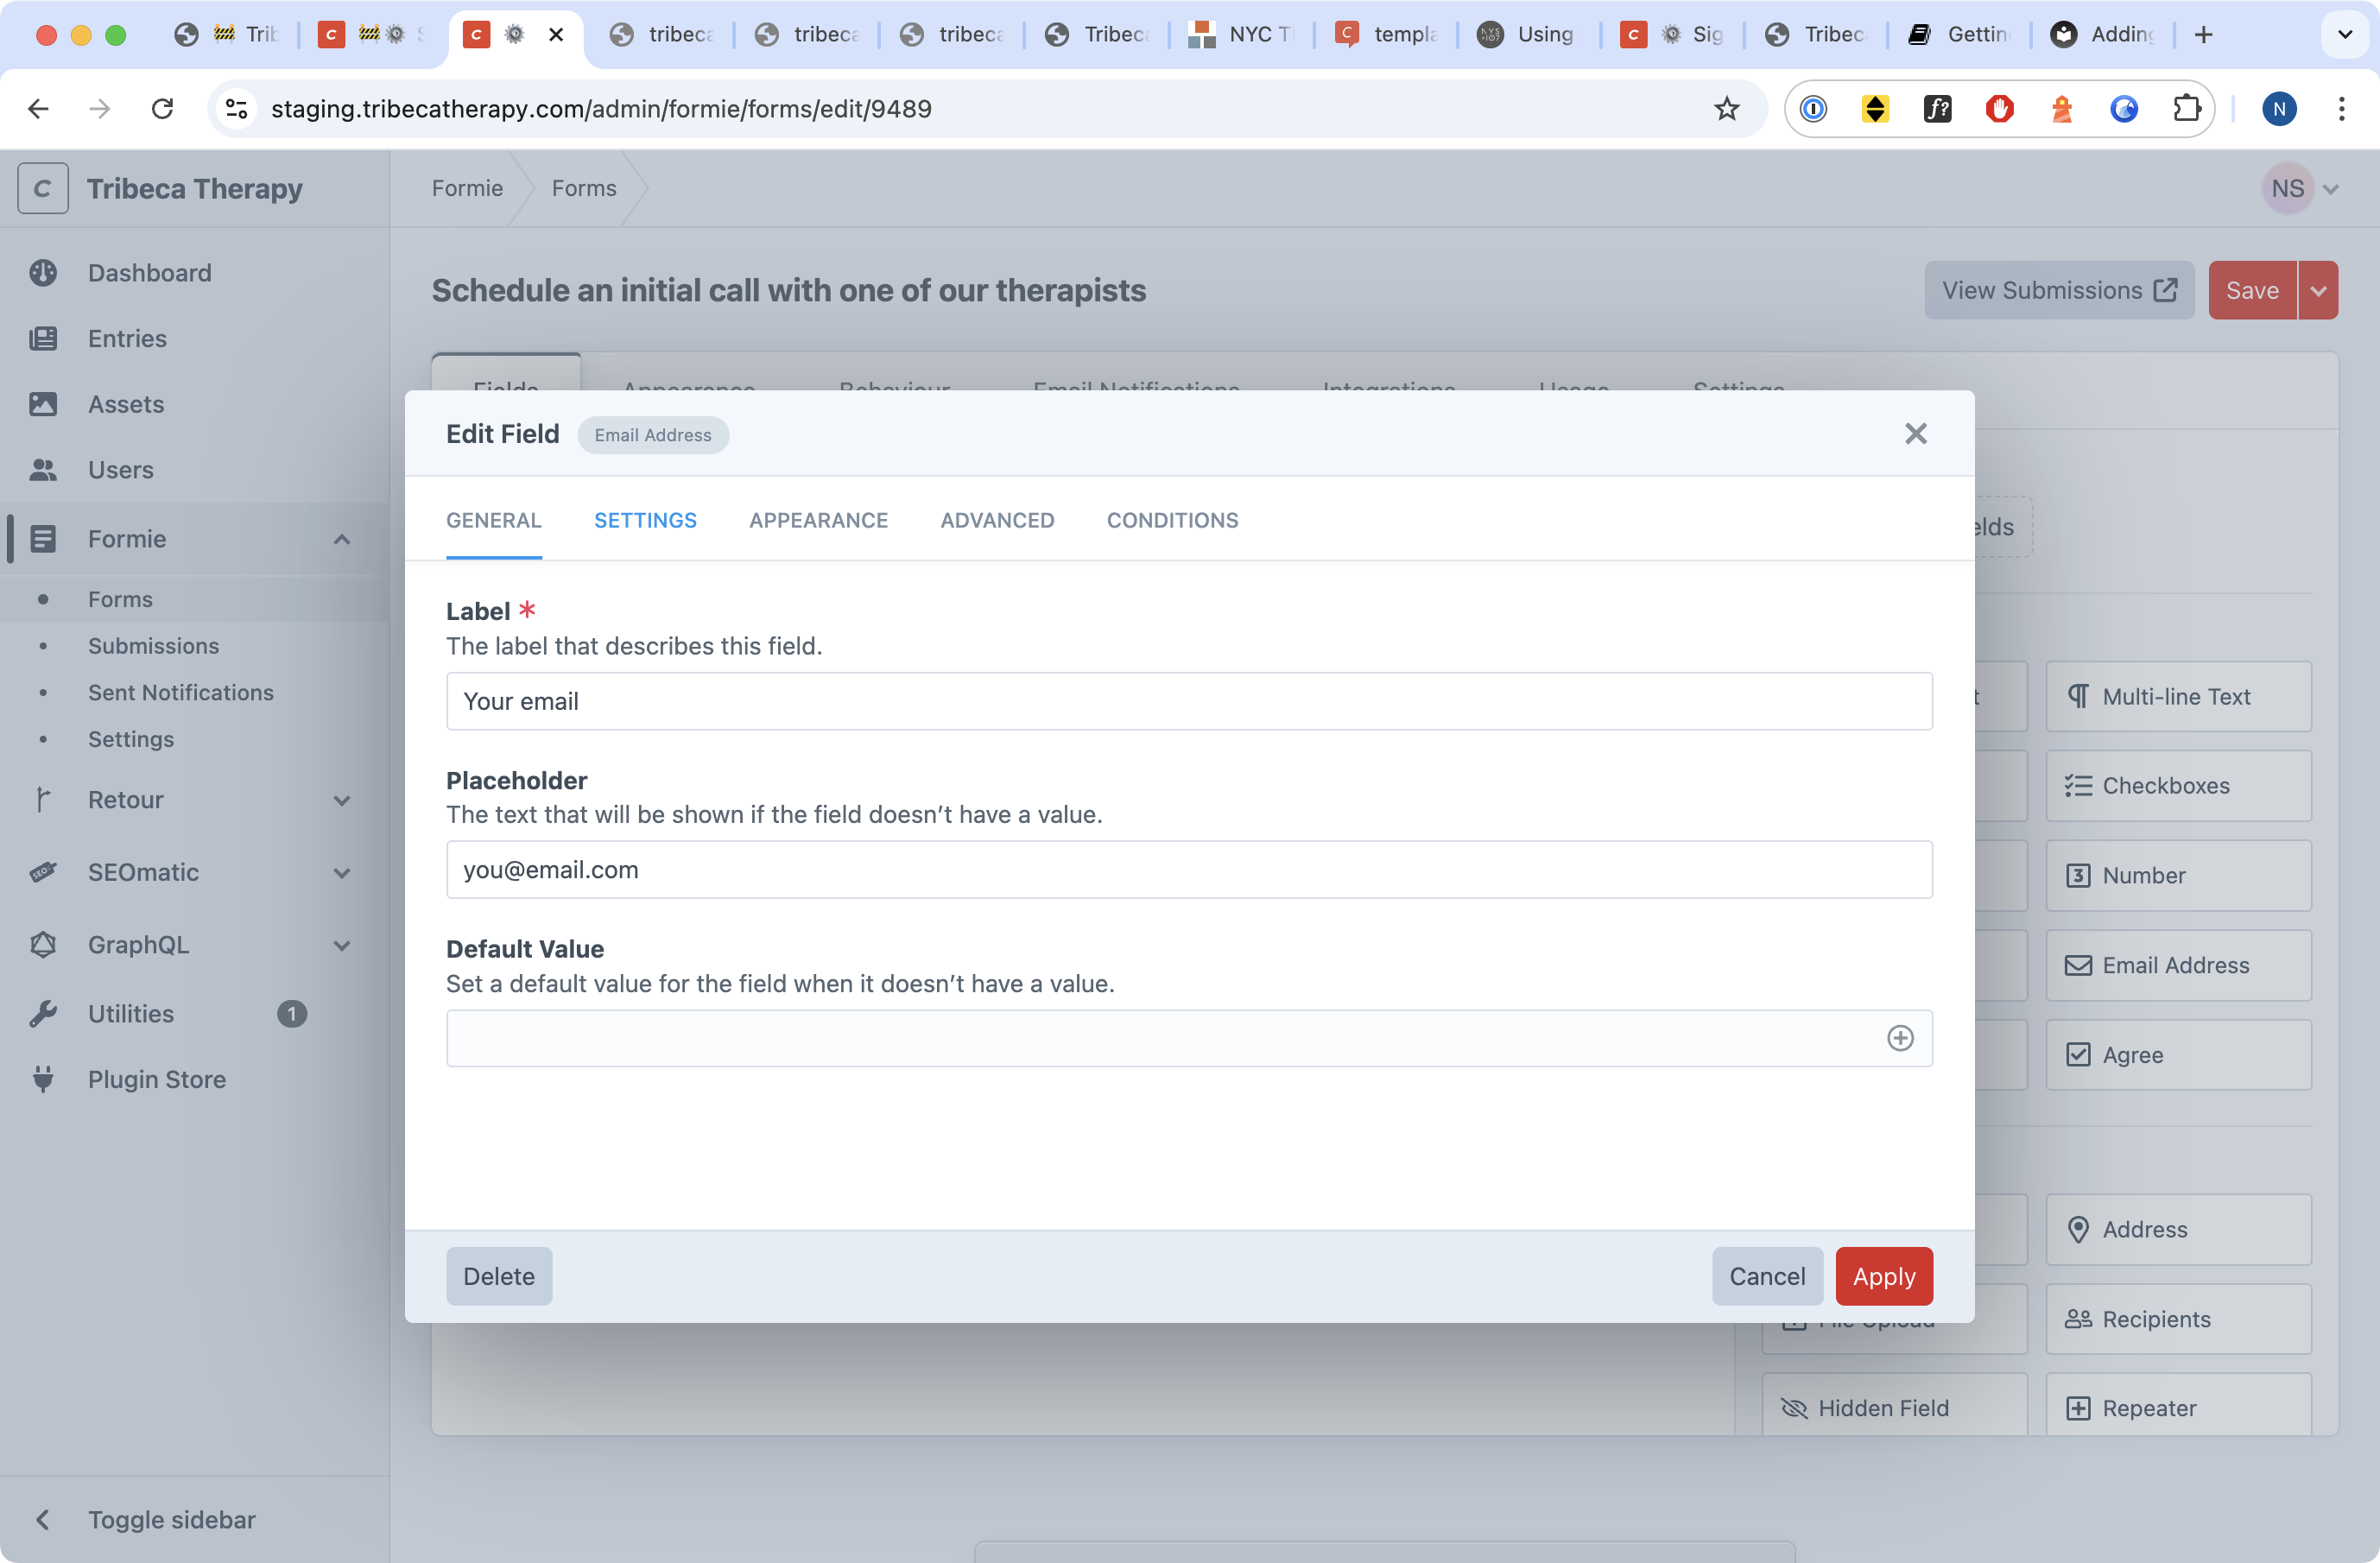
You'll note that the editors here are broken up into tabs. When you're editing a field, the tabs include:
- General (see above)
- Settings (make the field required, include or exclude the field from email notifications, etc)
- Appearance (dictate whether or not the form is visible and adjust some of its design details, like where labels go)
- Advanced (you can safely ignore the Advanced parameters; they are for developers), and
- Conditions. Conditions let you hide and show fields based on answers to other fields. It's very useful if you need to create a complex form.
If you are editing a form, you'll have the following tabs available to you:
- Fields (this is the main editor)
- Appearance (adjust some of the visual details about how forms work)
- Behaviour (change the thank you messages, error messages, and how the form loads after receiving an input)
- Email noticiations (adjust the emails that are received or sent when a form is submitted)
- Integrations (for third-party plugins)
- Usage (where the form is used on the site)
- Settings (change the name of the form and adjust the form's data retention policies)
Editing a form is much easier than it looks. Once a form is put together using drag and drop, don't forget to adding it to a page.
Editing thank you and error messages
To change a form's thank you message or error message, edit the form you want to update and click on the Behaviour tab.
From here, you want to make a few changes every time you make a new form:
- Change the Submissions method dropdown to Ajax (Client-side). This allows forms to be submitted without reloading a page or navigating to another page.
- Change the Action on Submit option to say "Display a message," if it doesn't already.
- Change the Submission Message to whatever you like. (This is your "Thank you" text.) You can also hide the form on submission, and adjust where the submission message goes (I like to put it at the bottom of the form).
- Scroll down to the Error Message field and change it if you like. I also like to change the Error Message Position to the bottom of the form.
- Hit Save.
Get email notifications when a form is submitted
Form notifications are not enabled by default. To enable them, click on the Email Noticiations tab while editing a form. Then click on + New Notification.
This process should be fairly self-explanatory, but on the off chance that it's not:
- Enable the email notification with the Enabled toggle (make sure it's in the On position)
- Name the notification whatever you like.
- I usually give the Recipients specific email addresses.
- In the Email Content field, click the
+button beside the bold and italic buttons to see all the form variables. I just click "All form fields" every time to make this process fast.
There are a few other things you might want to do as well:
- You can use the Preview tab to see an example of what your email might look like with dummy data
- The Advanced tab lets you add CC and BCC emails if you want to carbon copy anybody, as well as change the from email and from name to match your preferences.
You can also use the email notifications area to create an email that notifies the person who submitted the form that their request has been received. In other words, if Jesse Doe submitted the form, you could use the email notifications screens to create an additional email that lets Jesse know you've received their request, and you'll be in touch soon.
Prevent spam
If you are getting spam from your forms, there are a couple quick ways you could fix that.
First, select the form that's been giving you trouble. Then click on the Integrations tab.
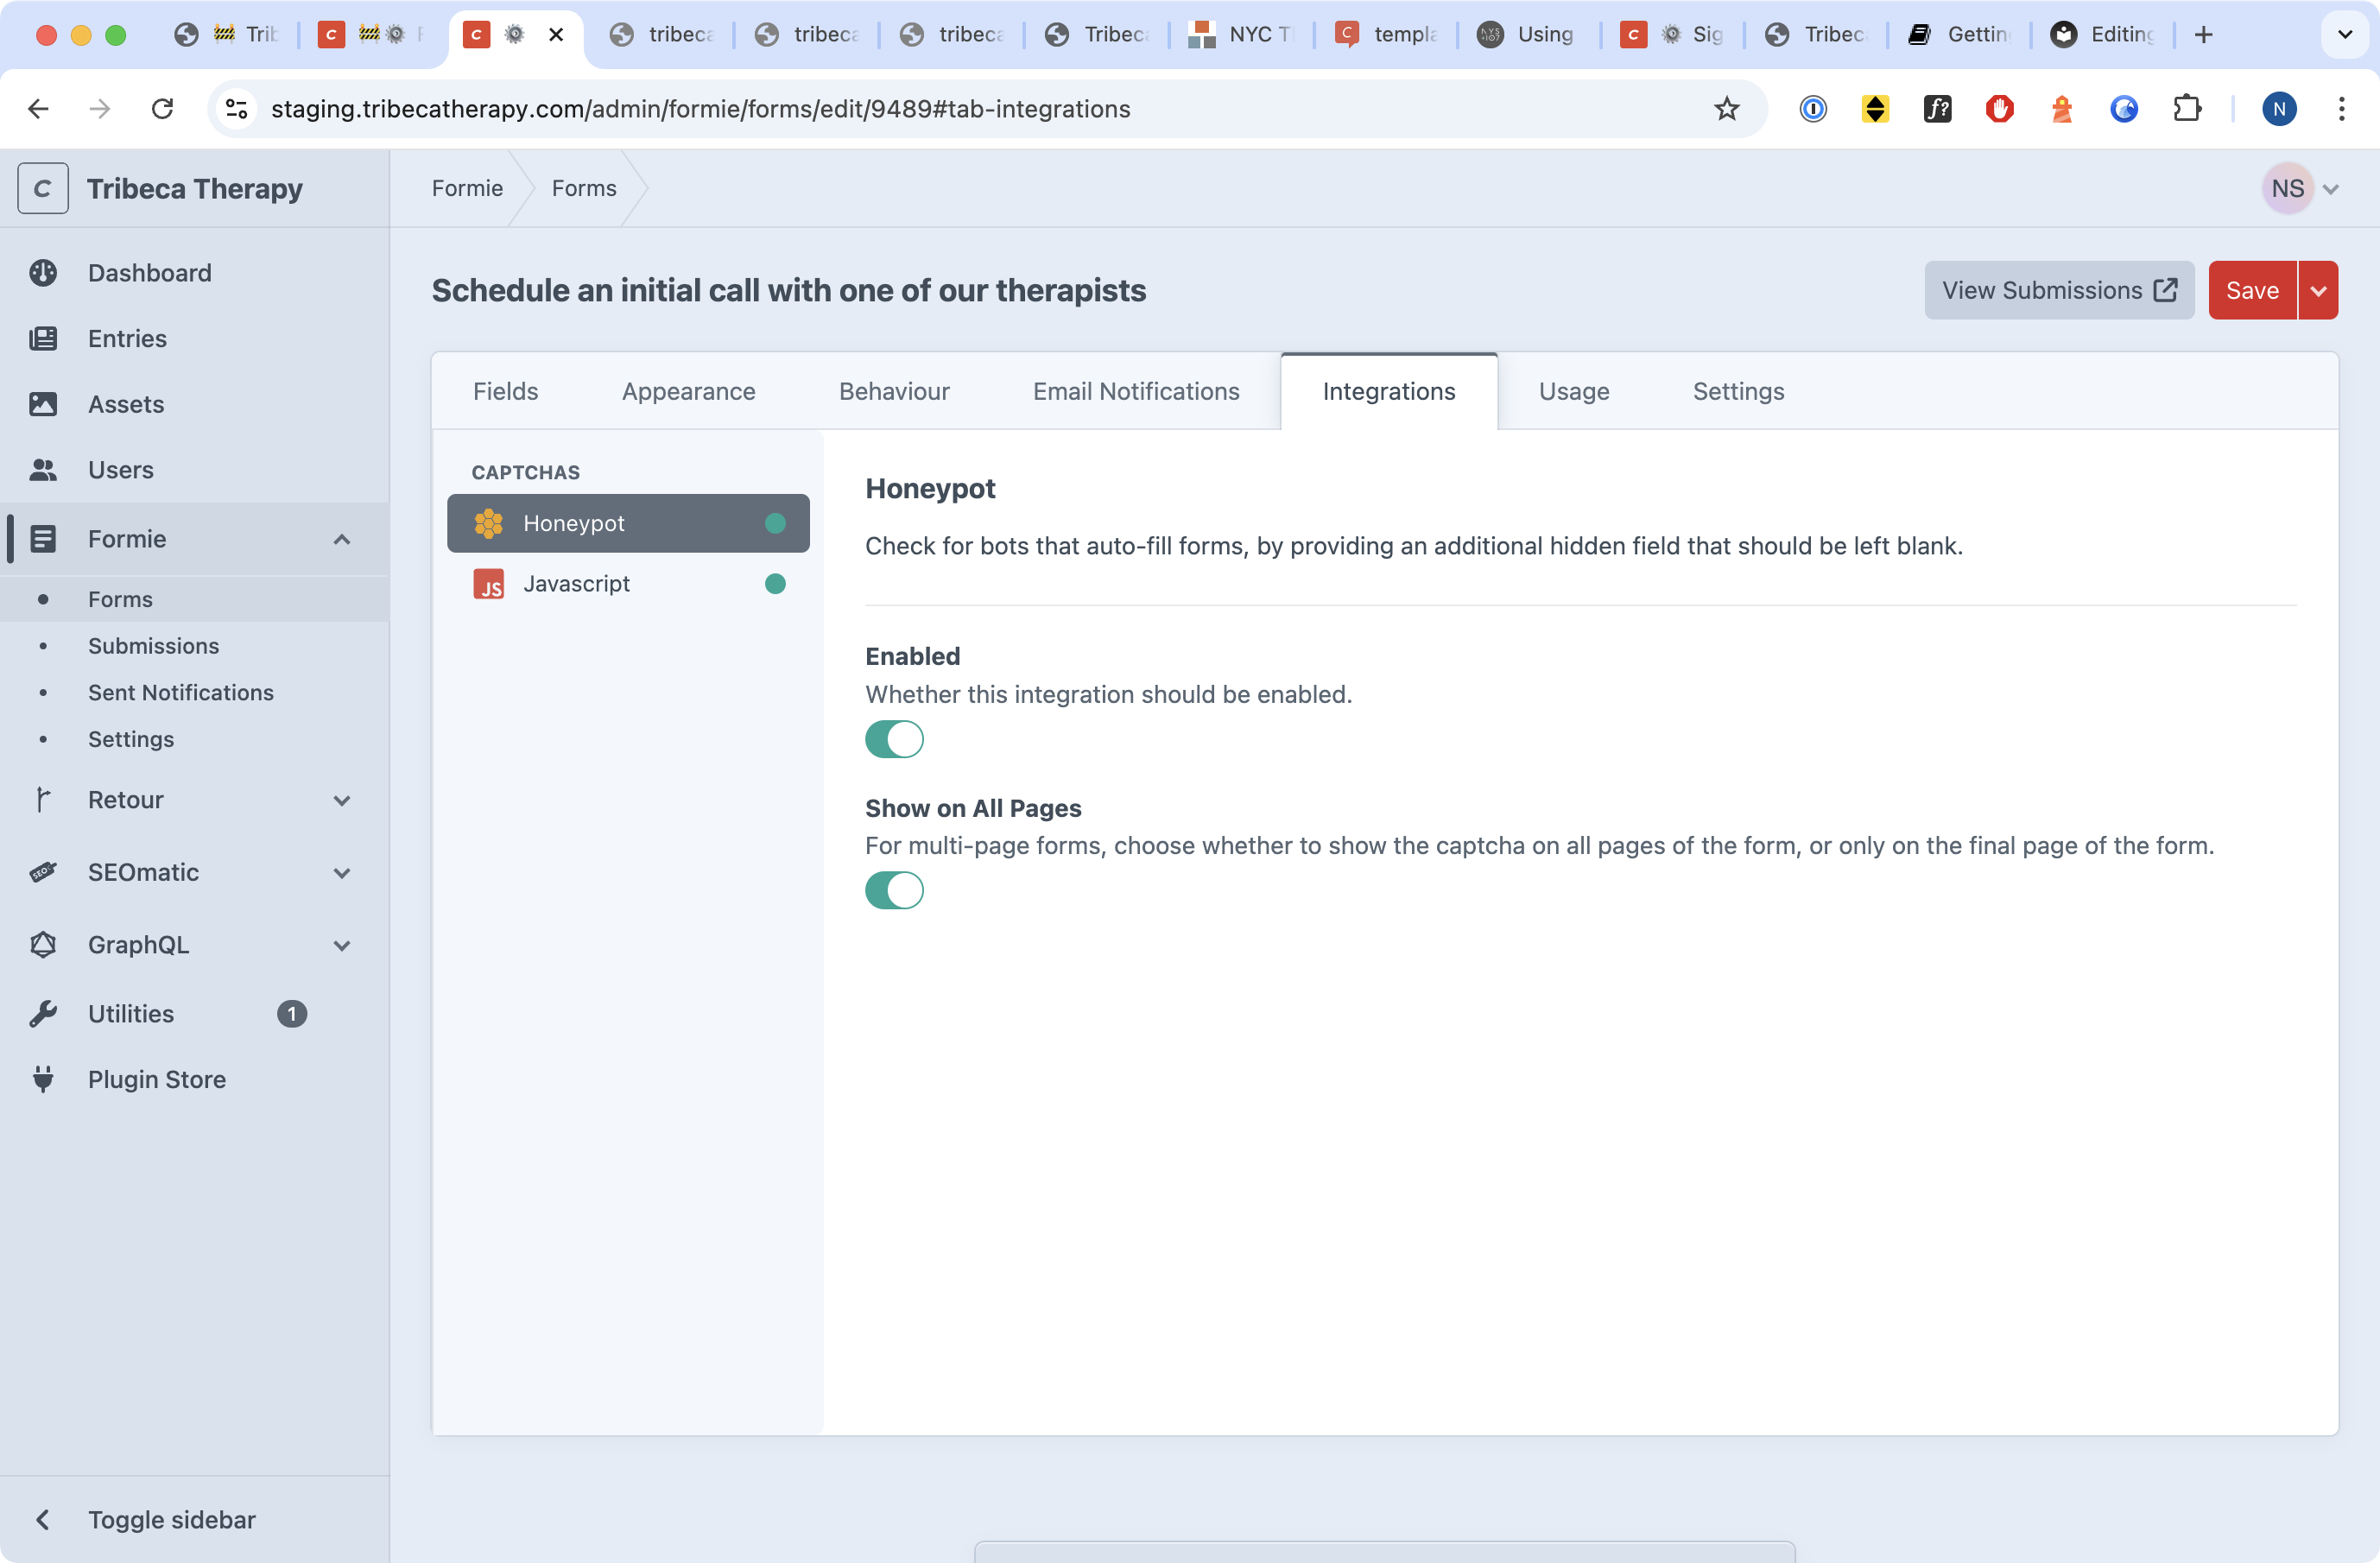
From here, you'll see a couple options in a panel on the left. Both of these options will help reduce your spam.
- Honeypot: this creates an additional hidden field in your form. Humans can't see it, and it's not required, but a robot will see it and fill it in. If this field gets filled in, it's spam. Enable this and enable the option to show it on all pages.
- Javascript: if you enable this, and the user doesn't have Javascript enabled, they won't be able to send you a message. These days, the odds of somebody having Javascript disabled are pretty low, but it is a risk. I typically think this is a risk worth taking, though, and I like to enable it everywhere and show it on all pages.